


One effective way to enhance your slides is by using custom background images. By incorporating visuals into your presentation, you can grab your audience’s attention and convey your message more effectively. In this blog post, we will guide you through the process of making a picture a background in PowerPoint, helping you take your presentations to the next level.
How To Make a Picture a Background in PowerPoint
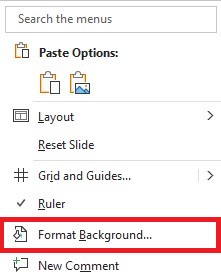
Step 1:
Once you have PowerPoint open, navigate to the slide you want to change your background on. Right click on the slide which will trigger a new menu to pop up. Select Format Background.
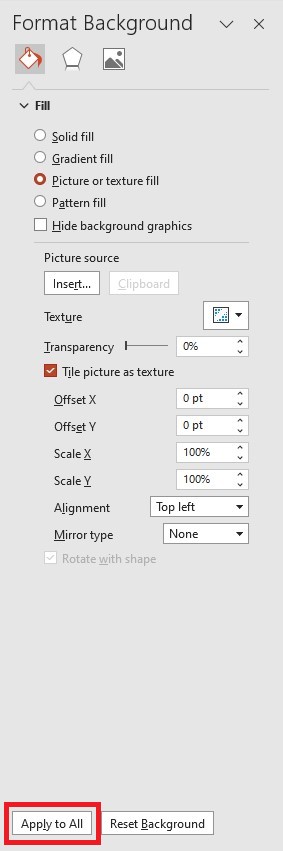
Step 2:
Next, a new menu pane will pop up on the right side of your screen. Ensure you are on the paint can tab and select Picture or texture fill. Under Picture Source, select Insert and navigate to the picture you are wanting to put as the background.

Step 3:
After your desired picture is now the background on your PowerPoint slide, you can Apply to all slides, or leave it on one single slide.
Congratulations! You now know how to set custom images as your background on PowerPoint slides. The process of making a picture a background in PowerPoint is relatively straightforward and allows you to personalize your slides according to your content and branding. Experiment with different images, alignment, and settings to create visually stunning presentations that leave a lasting impact on your viewers.
More on Microsoft 365
Visit our Microsoft 365 Insights & Resources page to see more Microsoft tips & tricks! Whether you’re considering getting Microsoft 365 and trying to figure out which tier makes sense for you, or if you already have Microsoft but want to get more value from your M365 tools and services, there is something for you.