Teams is Microsoft’s communication and collaboration platform. One of Teams’ most valuable features is it’s video conferencing capability. Whether you’re trying to talk to people within your organization or external people, setting up meetings and calls using Teams is extremely simple. If you aren’t too familiar with teams but have been invited to attend a Teams meeting then this guide is meant for you. This guide will cover how to join a Teams meeting and some basic Teams’ features you need to know how to use.
Joining a Teams Meeting
Step 1. In the calendar invitation, you will find a link to join the Microsoft Teams Meeting. You can join via the link which will allow you to use your computer microphone, speakers and webcam. Alternatively, you can dial in using the phone number and Conference ID.
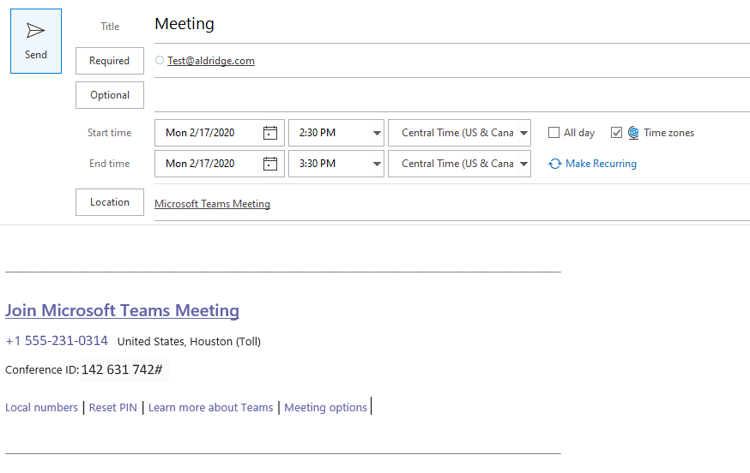
Step 2. After clicking the “Join Microsoft Teams Meeting” link the page below will appear.
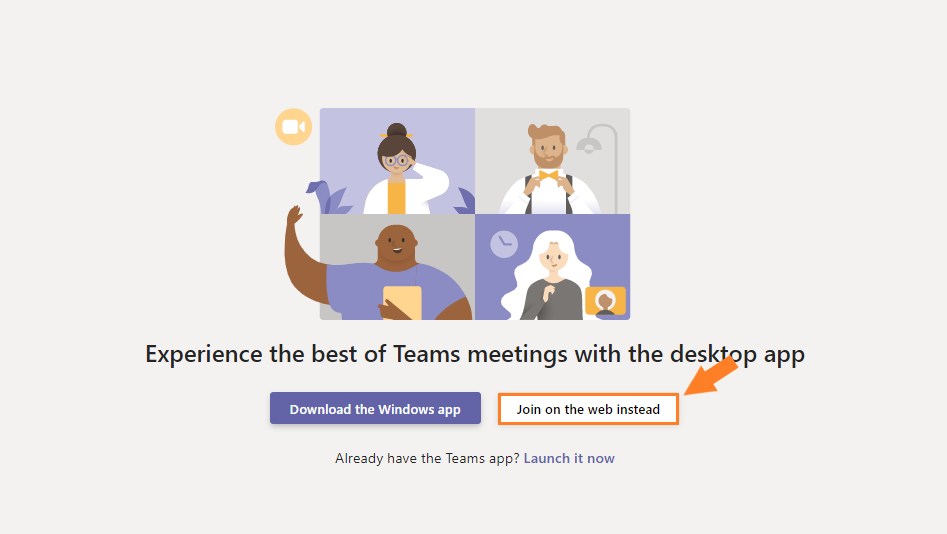
You can join a Teams meeting whether or not you have the Teams application installed. If you do not have the Teams application installed, select “Join on the web instead”.
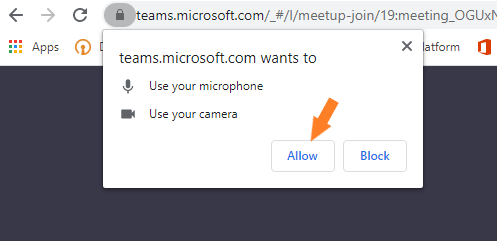
Step 3. Once you join the meeting, a popup may appear asking you for permission to access your microphone and camera. Click “Allow”.
Step 4. Now that Teams has access to your microphone and camera you will see your camera feed in the Teams window. If you have multiple cameras, speakers or microphones, you can control which device you want to use by selecting the “Devices” button. 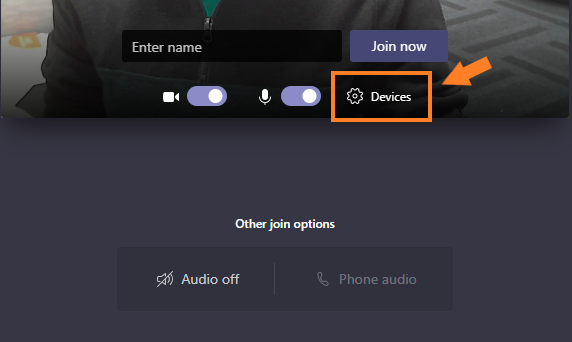
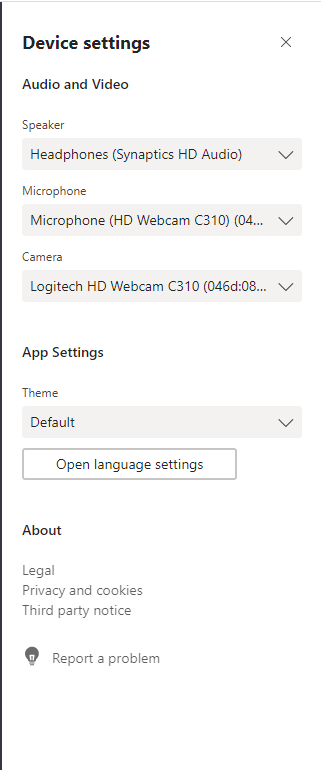
After clicking the “Devices” button, a popup will appear on the right-side of your Teams window, here you can select alternative Speakers, Microphones, or Cameras.
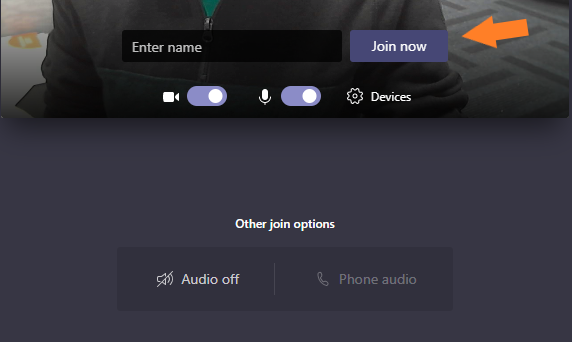
Step 5. Once you have the correct camera and microphone selected, enter your name and click “Join now”.
If you’re joining as a guest, you may be placed into a lobby after clicking “Join now”. If you’re in a lobby you’ll see this on your screen:
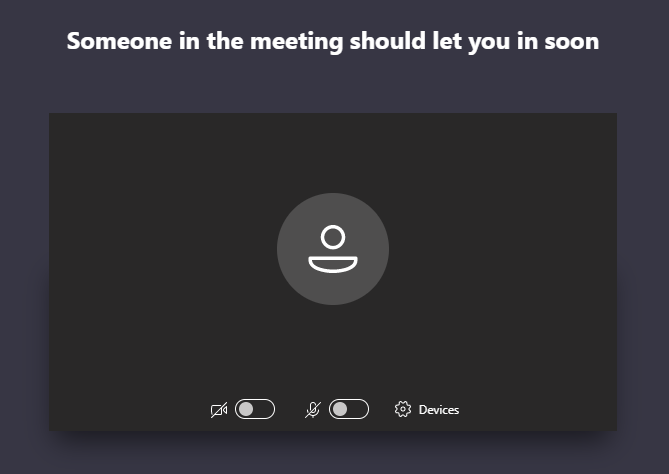
If you’re in a lobby just sit tight and wait for someone to let you into the meeting.
Once You’re in a Meeting
Now that you’ve joined a Teams meeting this will be your view. If you hover over the teams window a toolbar will appear near the bottom of the window.
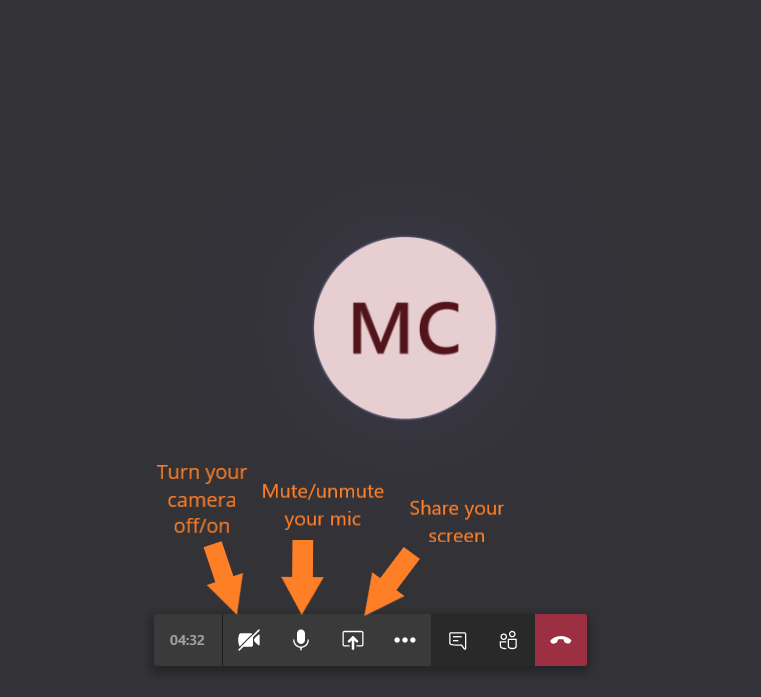
The camera icon will turn your camera feed off/on.
The mic icon will mute/unmute your mic.
The icon with a screen and an arrow on it will allow you to share your screen with the other people in the meeting.
Sharing Your Screen
To share your screen with other people in the Teams meeting, first click the screen share icon on your toolbar (mentioned above).
Once you click that icon, another bar will popup on the bottom of your screen.
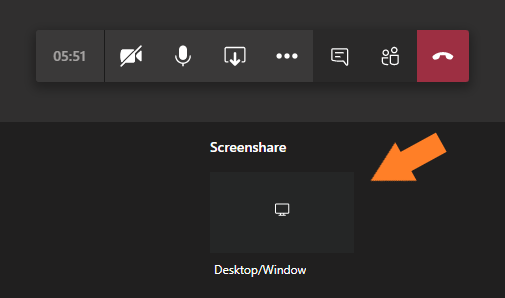
Click the “Desktop/Window” box that appears. After you click that box, this popup will appear.
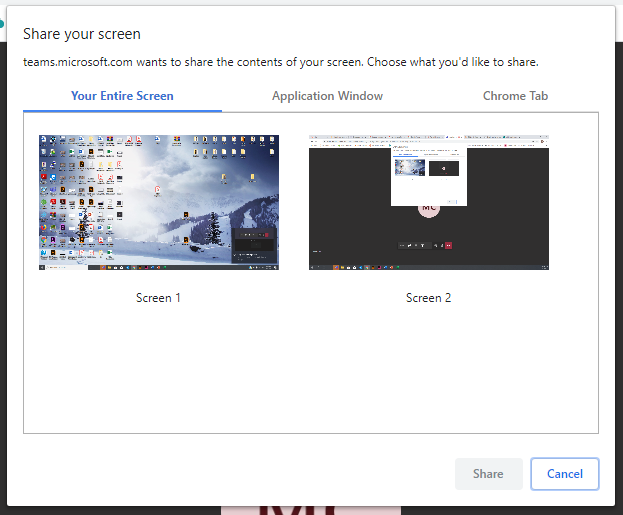
As shown above, there are three tabs in the screen share popup. Below is an explanation of each tab.
- Your Entire Screen – all of your monitors will appear under this tab. Select which monitor you want to share and everything that is on that monitor will be visible to other people in the meeting.
- Application Window – allows you to share a specific application window. For example, if you were presenting in Microsoft PowerPoint then you could select PowerPoint under this tab and the other attendees will only be able to see that application.
- Web Browser Tab – in this tab, you’re able to just share a specific tab that is currently open on your web browser.
If you want to know more about some of Team’s other features check out Microsoft’s Quick Start Guide for Teams. If you’re curious how Teams and other Office 365 applications can boost your business’s productivity then view our IT support services.


