


As a Microsoft Outlook user, you have tools that allow you to manage the flow of email through your inbox. It’s strongly recommended that you invest the time to configure your personal inbox to suit your work style and the type of mail you receive. This article will provide a brief overview of Outlook’s anti-spam capabilities so that you can focus your inbox and keep unwanted mail out.
For those that prefer video instruction, here is Aldridge CIO, Chad Hiatt, covering the main concepts of this article:
Receiving Junk Email in Your Inbox
You have multiple methods at your disposal to deal with junk mail that is hitting your inbox.
Option 1: Unsubscribe
If you’re receiving a promotional email from a legitimate source it is recommended that you find the unsubscribe link within the email and remove yourself from the mailing list. If you’re unsure whether the sender is legitimate or not, use one of the below options. If there is any doubt of the legitimacy of the sender, you want to err on the side of caution and avoid clicking on any links within the email.
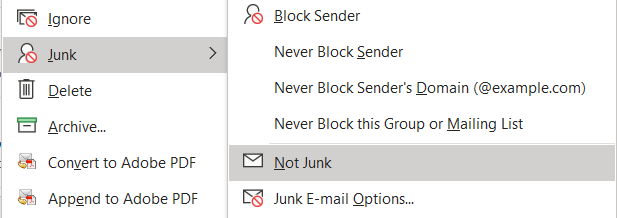
Option 2: Block Sender
If you’d like to avoid clicking on any unknown links, or if past attempts to unsubscribe from a specific mailing list have proved unsuccessful, you can right-click the message, hover over “Junk” and click “Block Sender”. The email will be sent to your junk folder and the sender will be added to your list of blocked contacts.
Option 3: Report as Junk
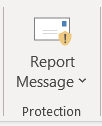
When you receive mail that is inappropriate or clearly junk you can use the “Report Message” tool. Using the “Report Message” tool will send the email back to Microsoft to be used to further tune their spam filtering toolset.
You can find the “Report Message” tool on your ribbon within Outlook. This is how it appears:
Click “Report Message”.
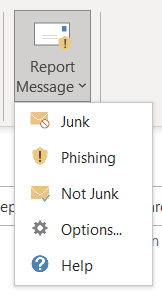
Select “Junk” from the dropdown menu. The reported email will then be moved to your junk folder
I Can’t Find the Report Message Button
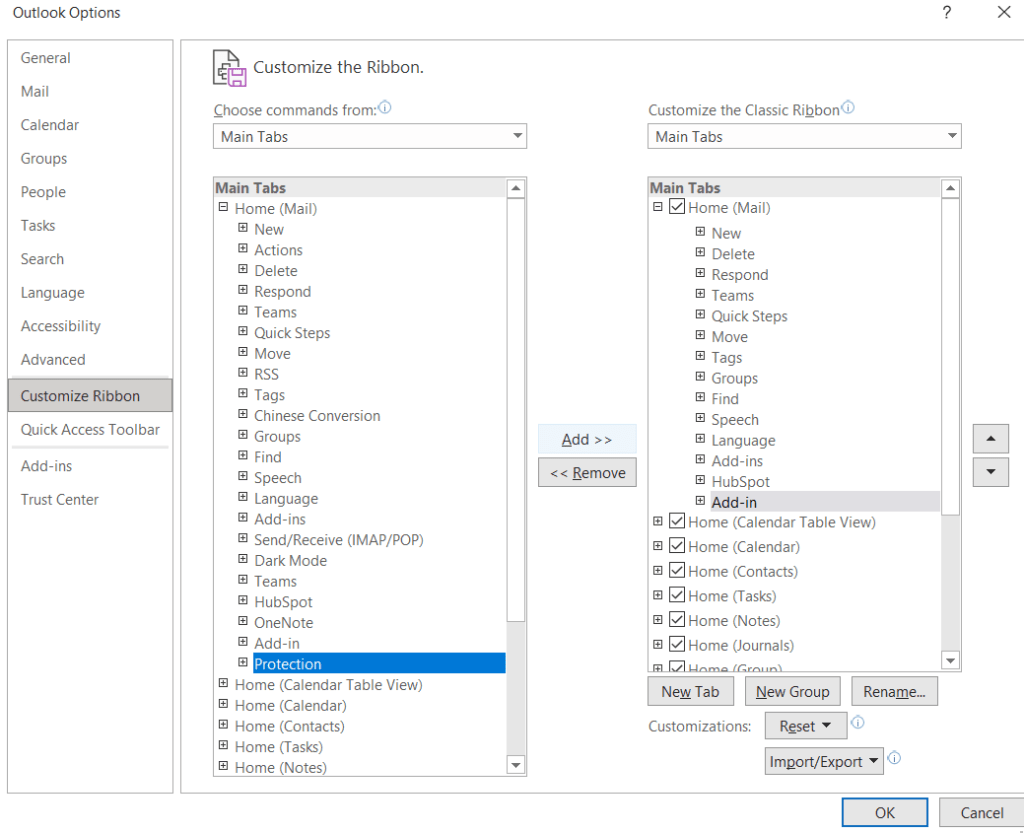
It is possible that the “Report Message” button is not readily available on your ribbon. To add it to your ribbon, within Outlook go to File > Options > Customize Ribbon.
Within the Customize Ribbon, find the box that says “Choose Commands From” and select “Main Tabs”. Within the list expand “Home (Mail)” and select “Protection”. Click “Add” and “OK”. You should now have the “Report Message” tool available on your Outlook Ribbon. Use the image below as guidance:
 If you do not see the “Report Message” tool within your “Customize Ribbon” options, it is possible that “Report Message” is not enabled for your organization. There could be a legitimate reason why it’s not enabled, reach out to your IT team to better understand why.
Real Email is Going to Junk
There are many processes that go into determining the legitimacy of an email before it hits your inbox. Unfortunately, these processes are imperfect and occasionally legitimate emails end up in your junk folder. You have multiple ways to address this issue:
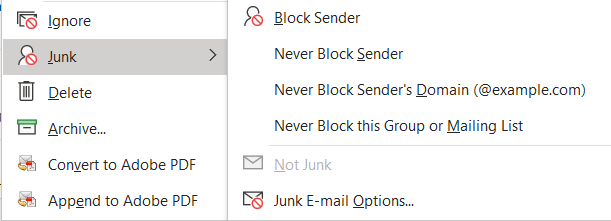
Option 1: Not Junk
The simplest way is to go to your junk folder, find the message that you want to move to your inbox, right-click it, hover over “Junk” and select “Not Junk”. The email will then move to your inbox.
Although this method is quick, it does not prevent future emails from that sender from going to your junk folder.
Option 2: Add Sender to Contacts
To add a sender to your contacts, hover over their e-mail address within the header of the e-mail. On the resulting pop-up, click “…” and select “Add to Outlook Contacts”.
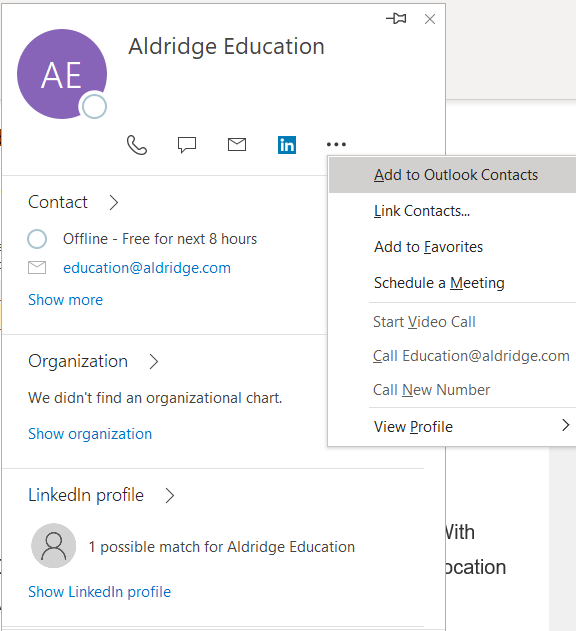
Now emails from that sender will always go to your inbox. This is assuming that you’ve enabled the safe sender setting for your contacts. If you’re unsure if that setting is enabled, go to the “Safe Senders” tab within “Junk Email Options”.
Junk Email Options
“Junk Email Options” contains some advanced settings for how to classify your inbound mail. To access “Junk Email Options” click on any email, hover over “Junk” and select “Junk Email Options”.
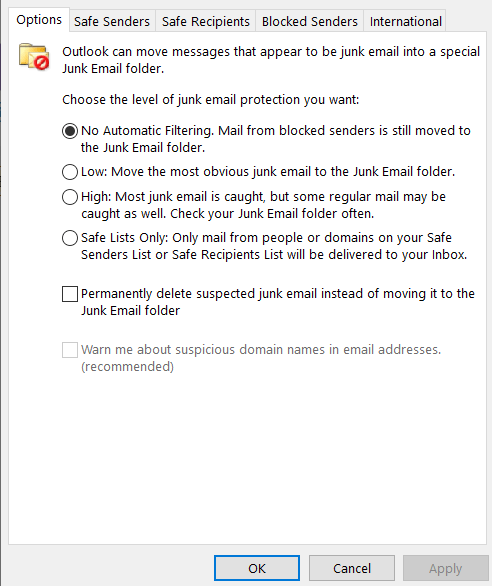
Set Level of Junk Email Protection
The first tab will allow you to adjust the level of automated spam filtering for your inbox. The option you select is based on your personal tolerance for spam in your inbox or having to check your spam folder for real emails. Select what you think will work for you and adjust the level as necessary.
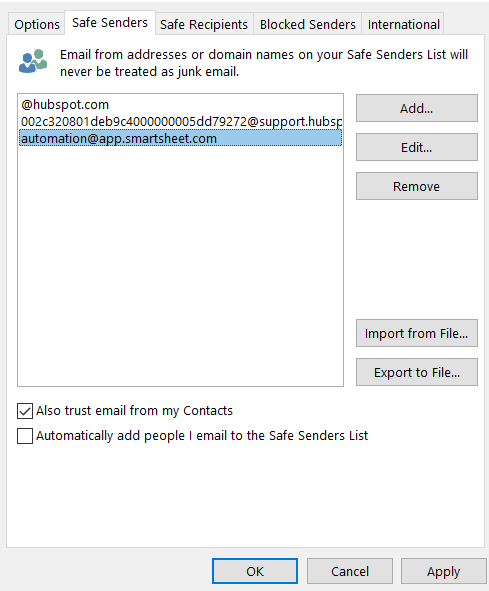
Safe Senders
Safe Senders are senders who you’ve designated as trusted and whose emails will never go to spam. The second tab of Junk Email Options is the “Safe Senders” tab where you’ll be able to see your list of Safe Senders. This is where you can adjust the setting to automatically trust emails from your contacts. You can also select an option to automatically designate everyone that you e-mail as a safe sender.
Block list
“Junk Email Options” is where you can manage your blocked contacts and domains. The tab “Blocked Senders” contains your block list and options to add or remove people from your list. If you were to accidentally block someone, you would need to come to this tab to find and unblock them.
We hope you have a better understanding of how to manage your junk email and keep your inbox clear. The guidance in this article is intended for email that is purely promotional spam. Potential phishing e-mails should be treated in an entirely different manner. To learn how to handle possible phishing emails check out this article, Reporting Phishing Emails in Microsoft Outlook.